Introduction
So you converted everything to WebP. Good. You did the right thing. Your site is faster, your Core Web Vitals are happier, and your bandwidth bill is smaller. Pat on the back, well done.
And now somebody wants the original back.
Maybe a client needs a JPEG to drop into a tool that still does not know what WebP is. Maybe your email marketing platform chokes on anything that is not a PNG. Maybe somebody opened a WebP in Photoshop on a five year old version and got a helpful error message instead of their photo. Whatever the reason, you need to turn a WebP back into a JPEG or a PNG, and you need it to not be a faff.
Here is how to do it, why it happens, and the bit nobody mentions about quality when you go backwards.
Why Would You Even Need to Convert Back?
WebP has roughly 96% browser support in 2026. That is brilliant for the web. The problem is that "the web" is not the only place images have to live. There is a whole world of software that has not caught up:
| Where WebP still causes trouble | What actually happens |
|---|---|
| Old image editors | "Cannot open this file" and a sad blank screen |
| Email clients | Some Outlook versions show a broken image icon |
| Older CMS platforms | Upload rejected, or silently ignored |
| Print and design software | "Unsupported format" and a phone call to you |
| Client folders | "You sent me a weird file, I can't open it" |
None of this is WebP's fault. WebP is a perfectly good format. It is just that the rest of the software world moves at the speed of a tired snail, and some of it has not bothered to add support yet.
So you convert back. Not because WebP was wrong, but because the thing downstream of you is not ready.
Advertisement
The Quick Way to Convert WebP Back
You do not need to install anything, sign up for anything, or upload your images to a stranger's server. WEBP Converter has a reverse mode built right in. Here is how it works:
- •Open the converter and hit the mode toggle to switch from "convert" to "reverse". You are now going the other way.
- •Pick your output format. A little picker appears letting you choose JPEG or PNG. JPEG for photos, PNG for anything with transparency or sharp edges.
- •Drop in your WebP files. One at a time or a whole folder at once, the batch handling works the same way as it does going forwards.
- •Download. You get JPEG or PNG files back, ready for whatever stubborn software was refusing to cooperate.
That is the whole thing. It runs entirely in your browser, so your images never leave your device, which is rather nice when the WebP you are converting back happens to be a client's unreleased work.
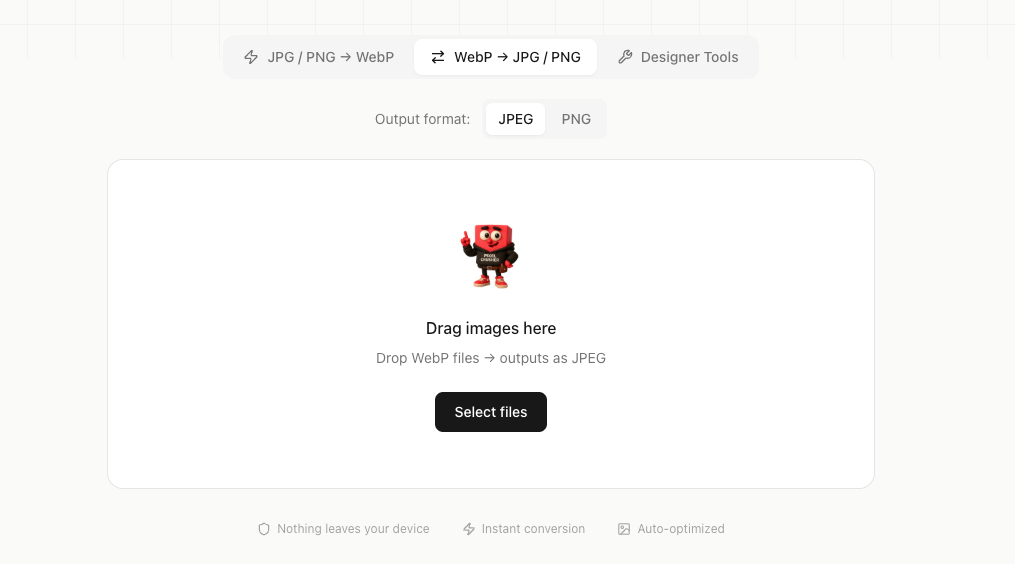
The reverse mode in WEBP Converter. Toggle to WebP → JPEG / PNG, pick your format, and drop in your files.
JPEG or PNG? Pick the Right One
When you convert back, you have a choice to make. It is not a coin flip.
Choose JPEG when:
- •The image is a photograph
- •You do not need transparency
- •You want the smallest file
Choose PNG when:
- •The image has transparency you need to keep
- •It is a logo, icon, or graphic with sharp edges and text
- •File size matters less than crispness
The rule of thumb is the same one that applied before the image was ever WebP in the first place. Photos like JPEG. Graphics like PNG. Nothing complicated about it.
Advertisement
The Bit Nobody Mentions: You Lose a Little Going Backwards
Here is the honest part. When you convert a JPEG to WebP, you keep the quality and shrink the file. When you convert that WebP back to JPEG, you are re compressing an already compressed image. It is like photocopying a photocopy. The result is fine for most uses, but it is not quite the original.
This is not a flaw in the converter. It is just how lossy compression works. Every time you encode to a lossy format, you lose a tiny bit of information. Go JPEG to WebP to JPEG and you have been through the wringer twice.
What this means in practice:
- •If you still have the original JPEG or PNG somewhere, use that instead. Converting back from WebP is a fallback, not a first choice. The original is always better.
- •If the WebP is all you have got, converting back is perfectly fine for web use, previews, and most day to day work. Just do not expect it to be pixel identical to a file that was never compressed in the first place.
- •If you need true lossless output, choose PNG. PNG is lossless, so converting a lossless WebP to PNG preserves every pixel. Converting a lossy WebP to PNG preserves exactly what the WebP captured, no further loss, but the file will be larger.
When You Should Just Keep the WebP
Before you rush to convert everything back, it is worth checking whether you actually need to. A lot of the time the problem is not the format, it is the software, and the software has often caught up by now.
- •Modern browsers all support WebP. Chrome, Firefox, Safari, Edge, Opera. If the image is going on a website, keep the WebP.
- •Most modern image editors support WebP. Recent versions of Photoshop, Affinity Photo, GIMP, and others open it natively. An update might be all you need.
- •Most modern CMS platforms handle WebP. WordPress, Webflow, Shopify, the usual suspects. If yours does not, it might be time to ask why.
Converting back is the answer when something genuinely will not accept WebP. It is not the answer to "I am not sure if WebP works here." Check first. The answer is usually yes.
FAQ: Converting WebP Back to JPEG or PNG
Q: Can I convert a WebP back to JPEG or PNG? A: Yes. Use a converter with a reverse mode, like WEBP Converter. Switch to reverse mode, pick JPEG or PNG, drop in your WebP files, and download.
Q: Is converting WebP back to JPEG free? A: It can be. WEBP Converter does it for free, in your browser, with no sign up and no upload limits.
Q: Do I lose quality converting WebP back to JPEG? A: A little. Re encoding a lossy WebP to lossy JPEG compresses it a second time, so there is a small quality drop. If you still have the original JPEG, use that instead. For lossless output, convert to PNG.
Q: Should I convert back to JPEG or PNG? A: JPEG for photographs where you want a small file and do not need transparency. PNG for graphics, logos, and anything with transparency or sharp edges.
Q: Why does my software not open WebP files? A: It is probably an older version. WebP has been around since 2010 and has roughly 96% browser support in 2026, but some older image editors, email clients, and design tools have not added support. An update usually fixes it.
Q: Is it safe to upload my WebP files to an online converter? A: Not all converters are equal. Server based ones upload your images to a stranger's machine. A browser based tool like WEBP Converter runs the conversion locally, so your images never leave your device.
The Bottom Line
Converting WebP back to JPEG or PNG is not complicated. You toggle to reverse mode in WEBP Converter, pick your format, drop in the files, and download. Free, private, no software required.
The only thing to remember is that going backwards through lossy compression costs you a sliver of quality, so if you still have the original, use that. And if the image is going back on a modern website, honestly, just keep the WebP. It got small for a reason.
Chris from Pixelbricks
Web designer at Pixelbricks Design in London. Built WEBP Converter to help designers and developers optimise their images for free, right in the browser — no uploads, no limits, no cost.
Visit Pixelbricks Design →Related articles
Core Web Vitals Explained: A Practical Guide for 2026
LCP, INP, and CLS are the three metrics Google uses to judge your page experience. Here is what each one measures, the thresholds you need to hit, and how to actually improve them.
AVIF vs WebP: Which Next-Gen Image Format Should You Use?
Both AVIF and WebP crush JPEG and PNG. But which one should you actually serve in 2026? A practical comparison of compression, browser support, and when to use each.
Ready to optimise your images?
Try our free WebP converter and see the difference for yourself. Unlimited conversions, no registration required.
Start converting →